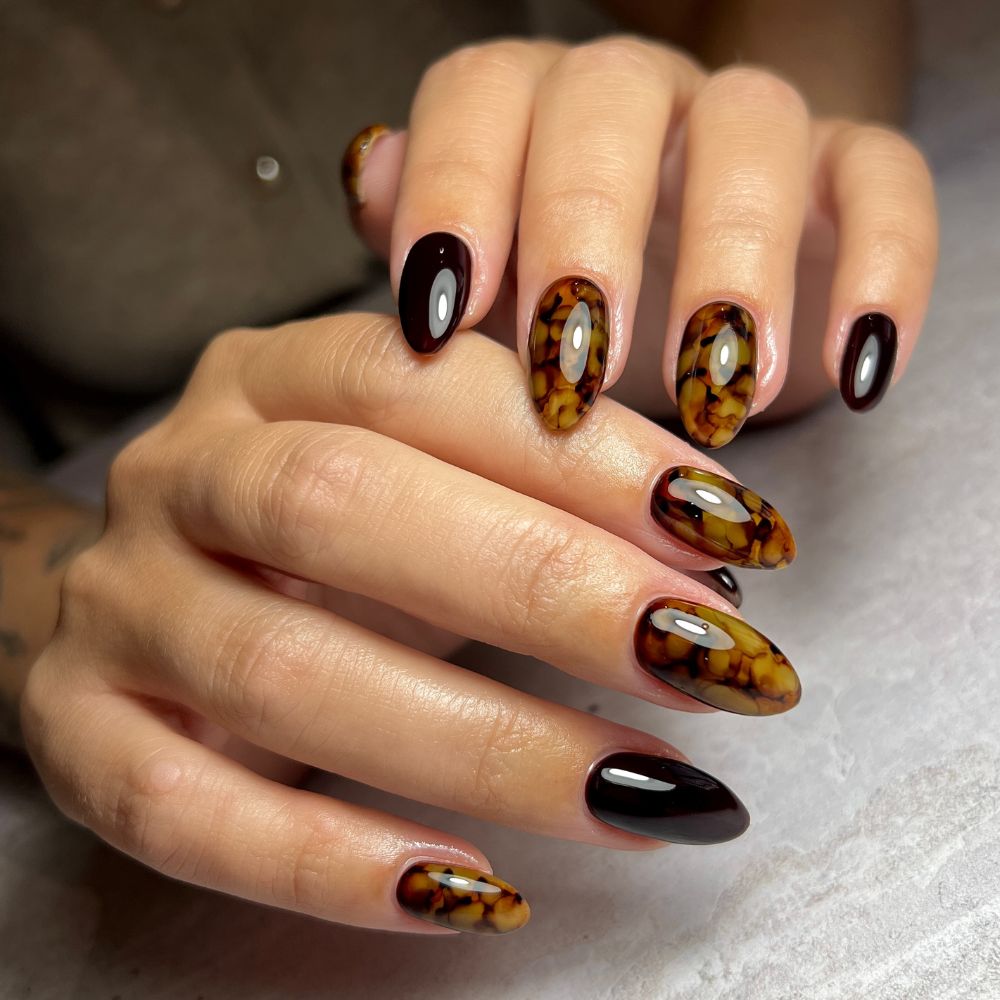
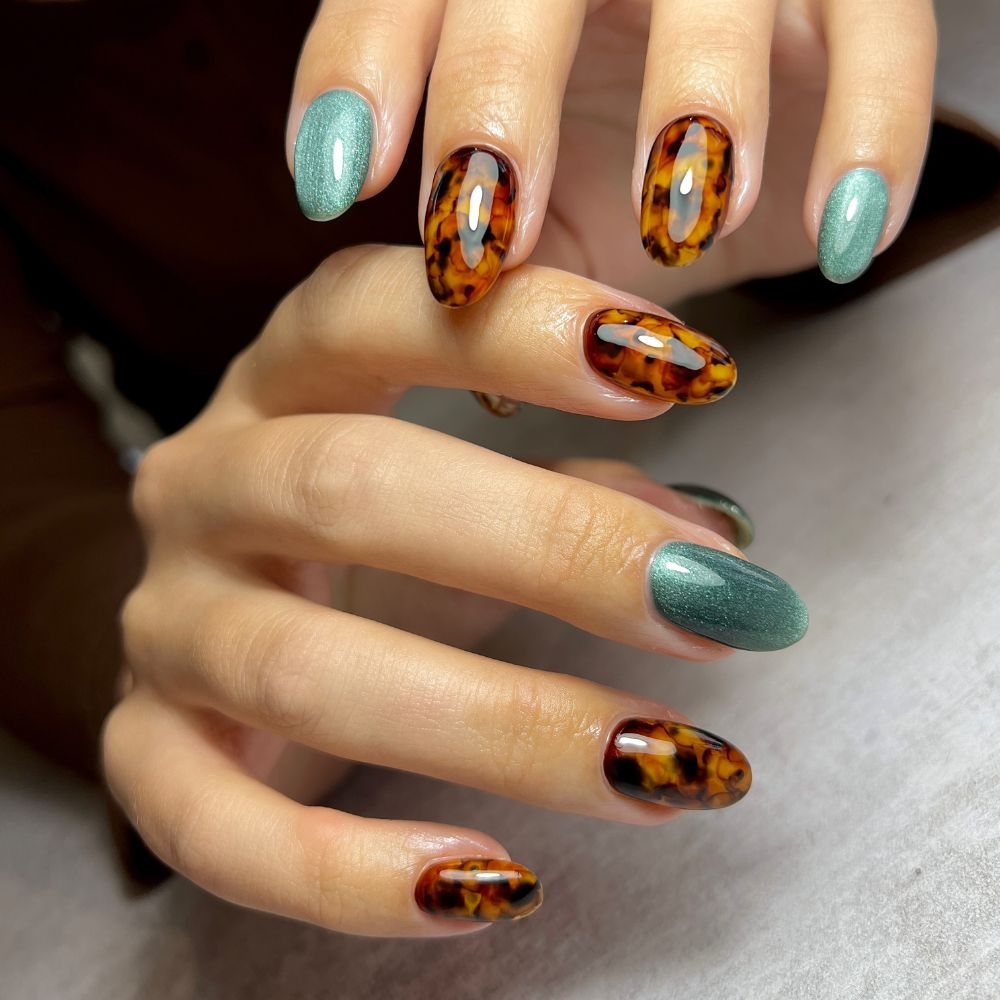
Tortoiseshell nails (or “tortie nails”) are a timeless autumn and winter nail trend loved for their warm tones and elegant, layered look
Discover how to recreate this sophisticated nail art design using gel polish, plus expert tips and creative twists from professional nail artists.
What are tortoiseshell nails?
Tortoiseshell nails – also known as tortie nails – are a layered nail art technique inspired by the natural pattern of a tortoise’s shell. This design combines translucent amber, brown and black tones to create depth and a luxurious, marbled effect.
How many colours do you need for tortoiseshell nails?
To recreate this look, Alice Horgan, a nail tech based in Stratford-upon-Avon, explains you only need three different colours. “For the perfect tortie, you need a glass yellow gel, along with any shade of brown, and a black.”
However, to give your design more dimension, Nottingham-based nail artist Learnah Starbuck explains that you can then mix your three shades to create additional complementary colours.

What formulas are best for creating tortie nails?
The product formulas you opt for to create tortoiseshell nails is down to personal preference.
While Horgan prefers to use a combination of gel polishes, including blooming gel, Starbuck takes a different approach.
“For me, using a mix of clear glass colours and alcohol inks has been my favourite method for creating tortoiseshell nails,” she shares. “I’ve always struggled to create a tortie that I truly feel happy with when using only gel, as it can be quite tricky to create depth and get the balance right.”
Step-by-step: How to create tortoiseshell nails with gel polish
Nail tech and Glitterbels ambassador Katie Turner shares how she uses gel polish to create tortoiseshell nails:
- A thin layer of glass polish for the base. Leave uncured and proceed to apply your light brown splodges and cure.
- You then want to apply another very thin layer of glass gel polish and add your dark brown or black splodges. You want to do this so they slightly overlap your previous splodges – don’t over think the design, tortie is meant to be random! Once you’ve done your black splodges, cure again.
- You then want to apply another thin layer of your base over the whole design, and cure.
Creative tortoiseshell nail design ideas
While a classic tortie is always a client favourite, others might be looking for a way to elevate the design.
“Tortoiseshell looks amazing with a little gold detailing, so maybe add a few spots of gold leaf or foil, or add some chrome shapes,” suggests Starbuck.
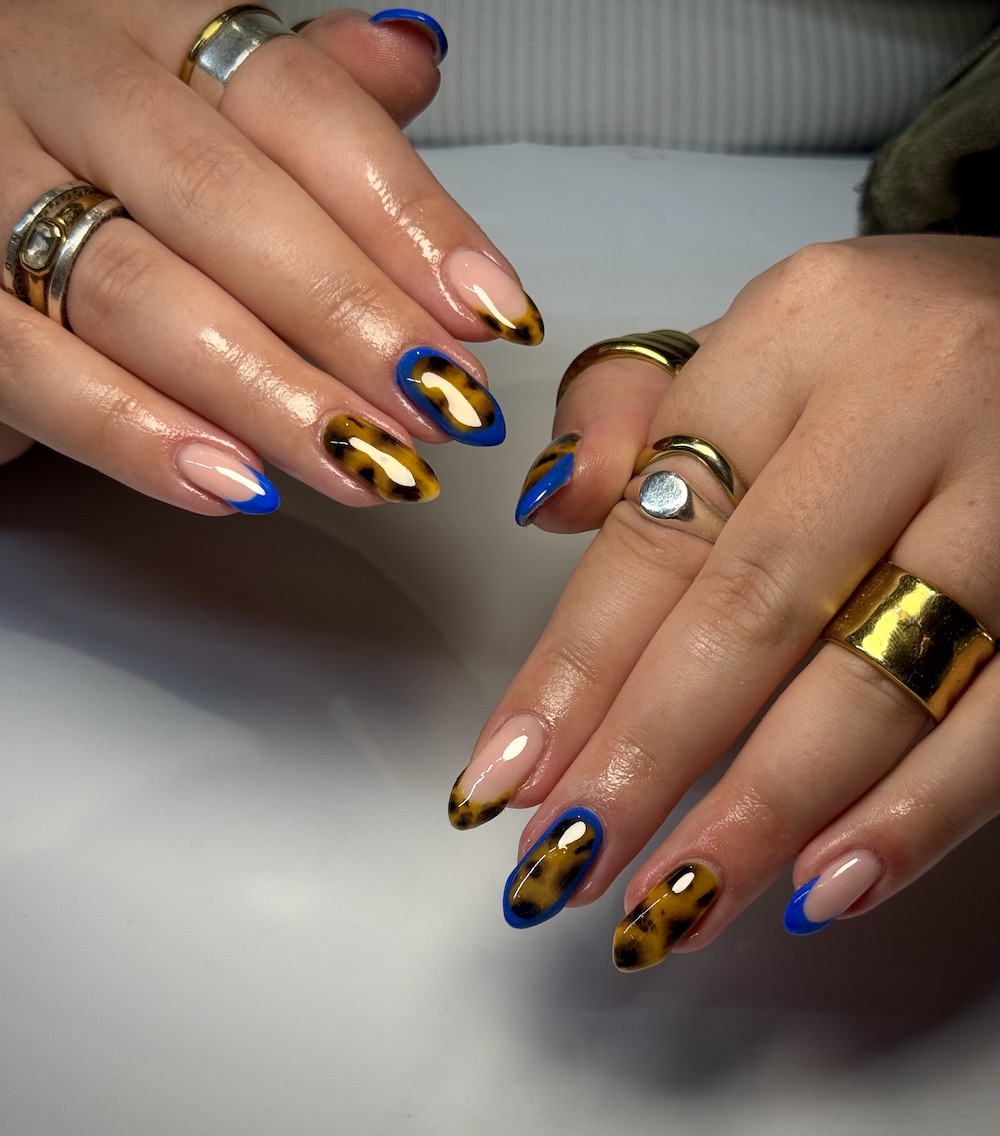
Meanwhile, instead of doing the full nail a tortie, Debbie Wilson, owner and manager of nail and beauty boutique Polished, suggests, “You could add in a bright coloured border or French, or even incorporate tortie into nail art, such as a heart or star.”
She also notes that lighter colours can be used for a blonde take on a classic tortoishell, or for a different effect, try cat eye gel under the glass colours.
If colour is on your client’s agenda, Starbuck also shares that you can swap out your base coat for a green or orange to create a whole new look.

Pro tips for creating tortoiseshell nails
· You only need a minimum of three shades
· The key to the perfect tortie nail is thin layers, or the nail can look bulky, says Horgan
· Avoid symmetry – the design is meant to be random, highlights Turner
You might also like: